Step 0: Install VSCode and PlatformIO's Extension
You can download VSCode here.
Once installed, go to VSCode's extension manager and look for the 'PlatformIO IDE' extension. Click install.

Step 1: Clone the CDP Repository
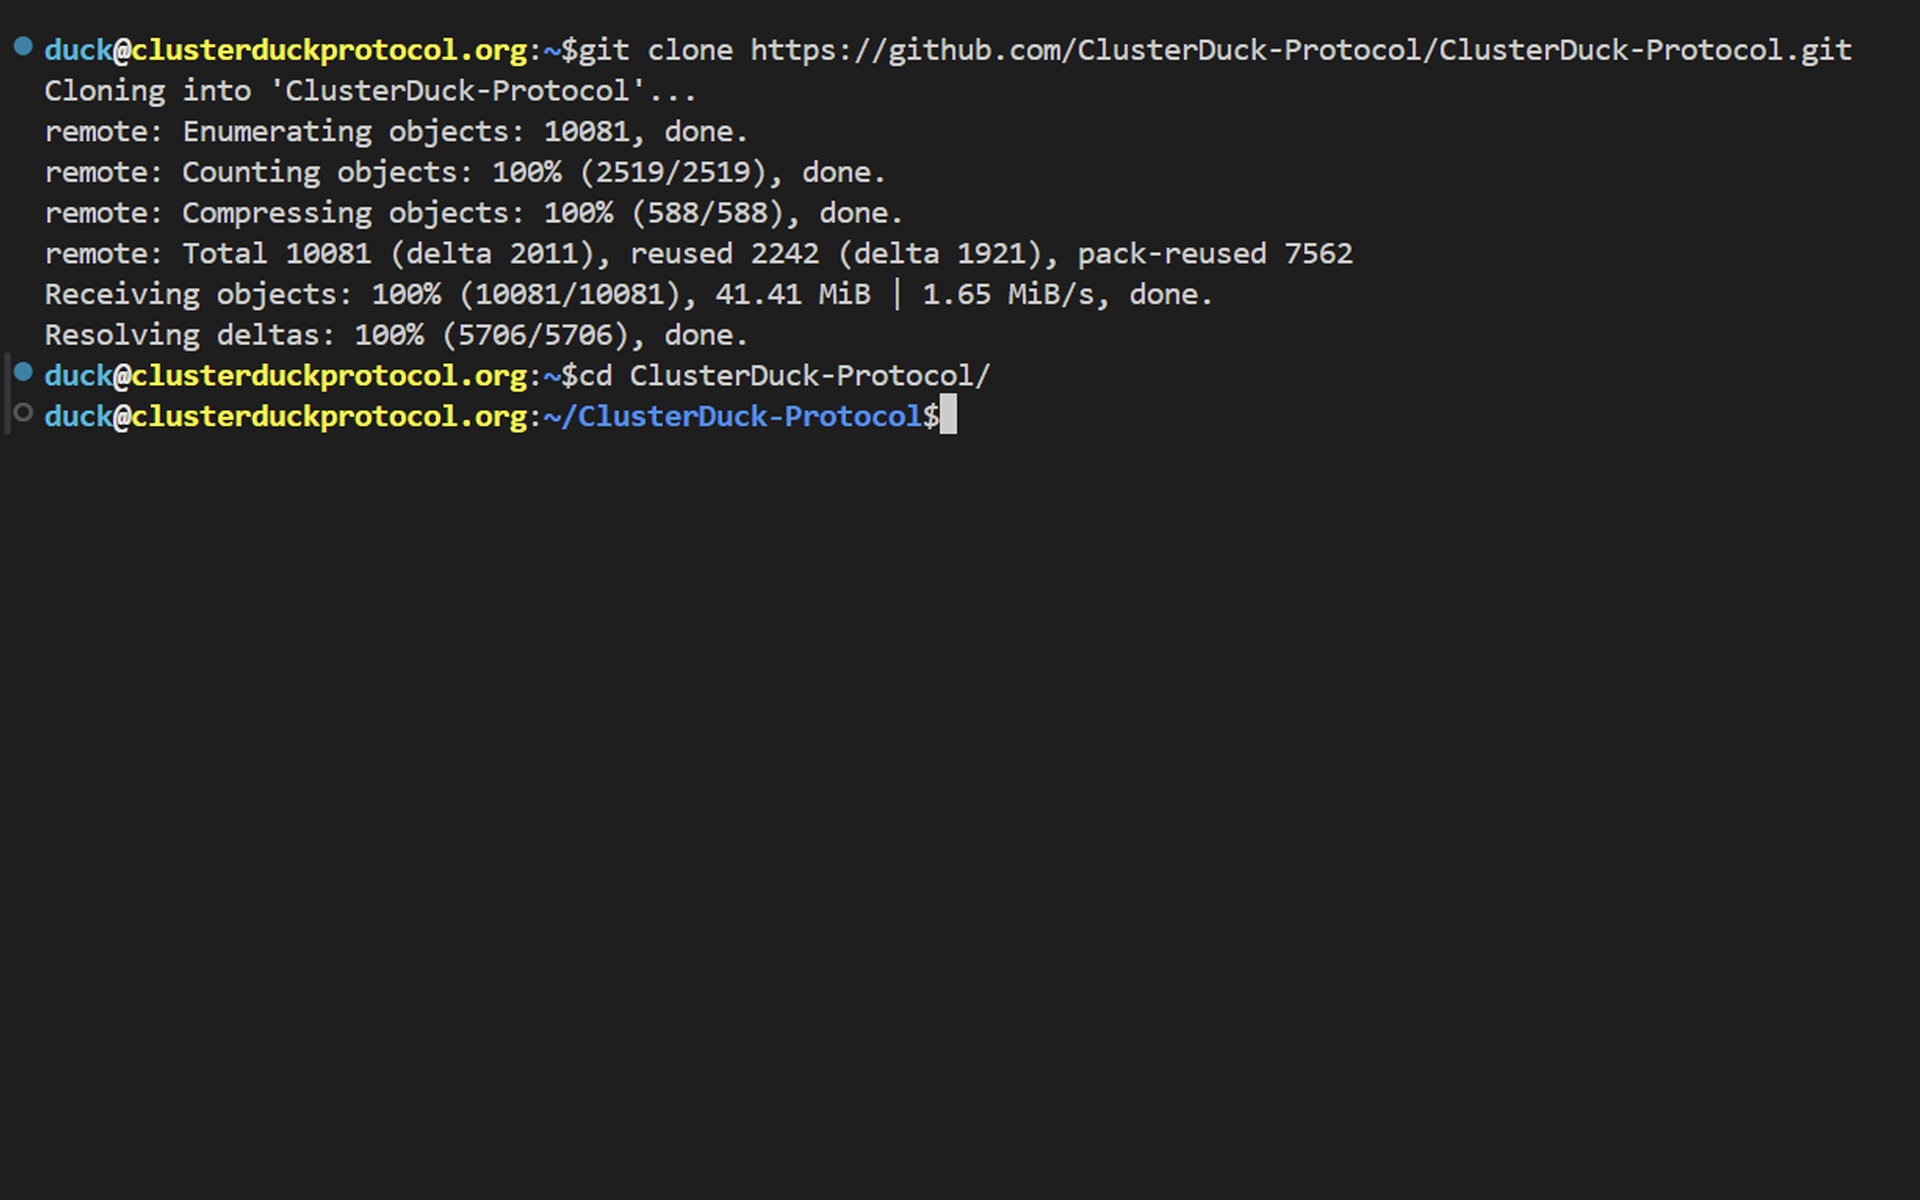
In the terminal, cd to your destination folder of choice.
Type git clone https://github.com/ClusterDuck-Protocol/ClusterDuck-Protocol.git
You should now have a ClusterDuck-Protocol folder in your directory.
Step 2: Configure MamaDuck
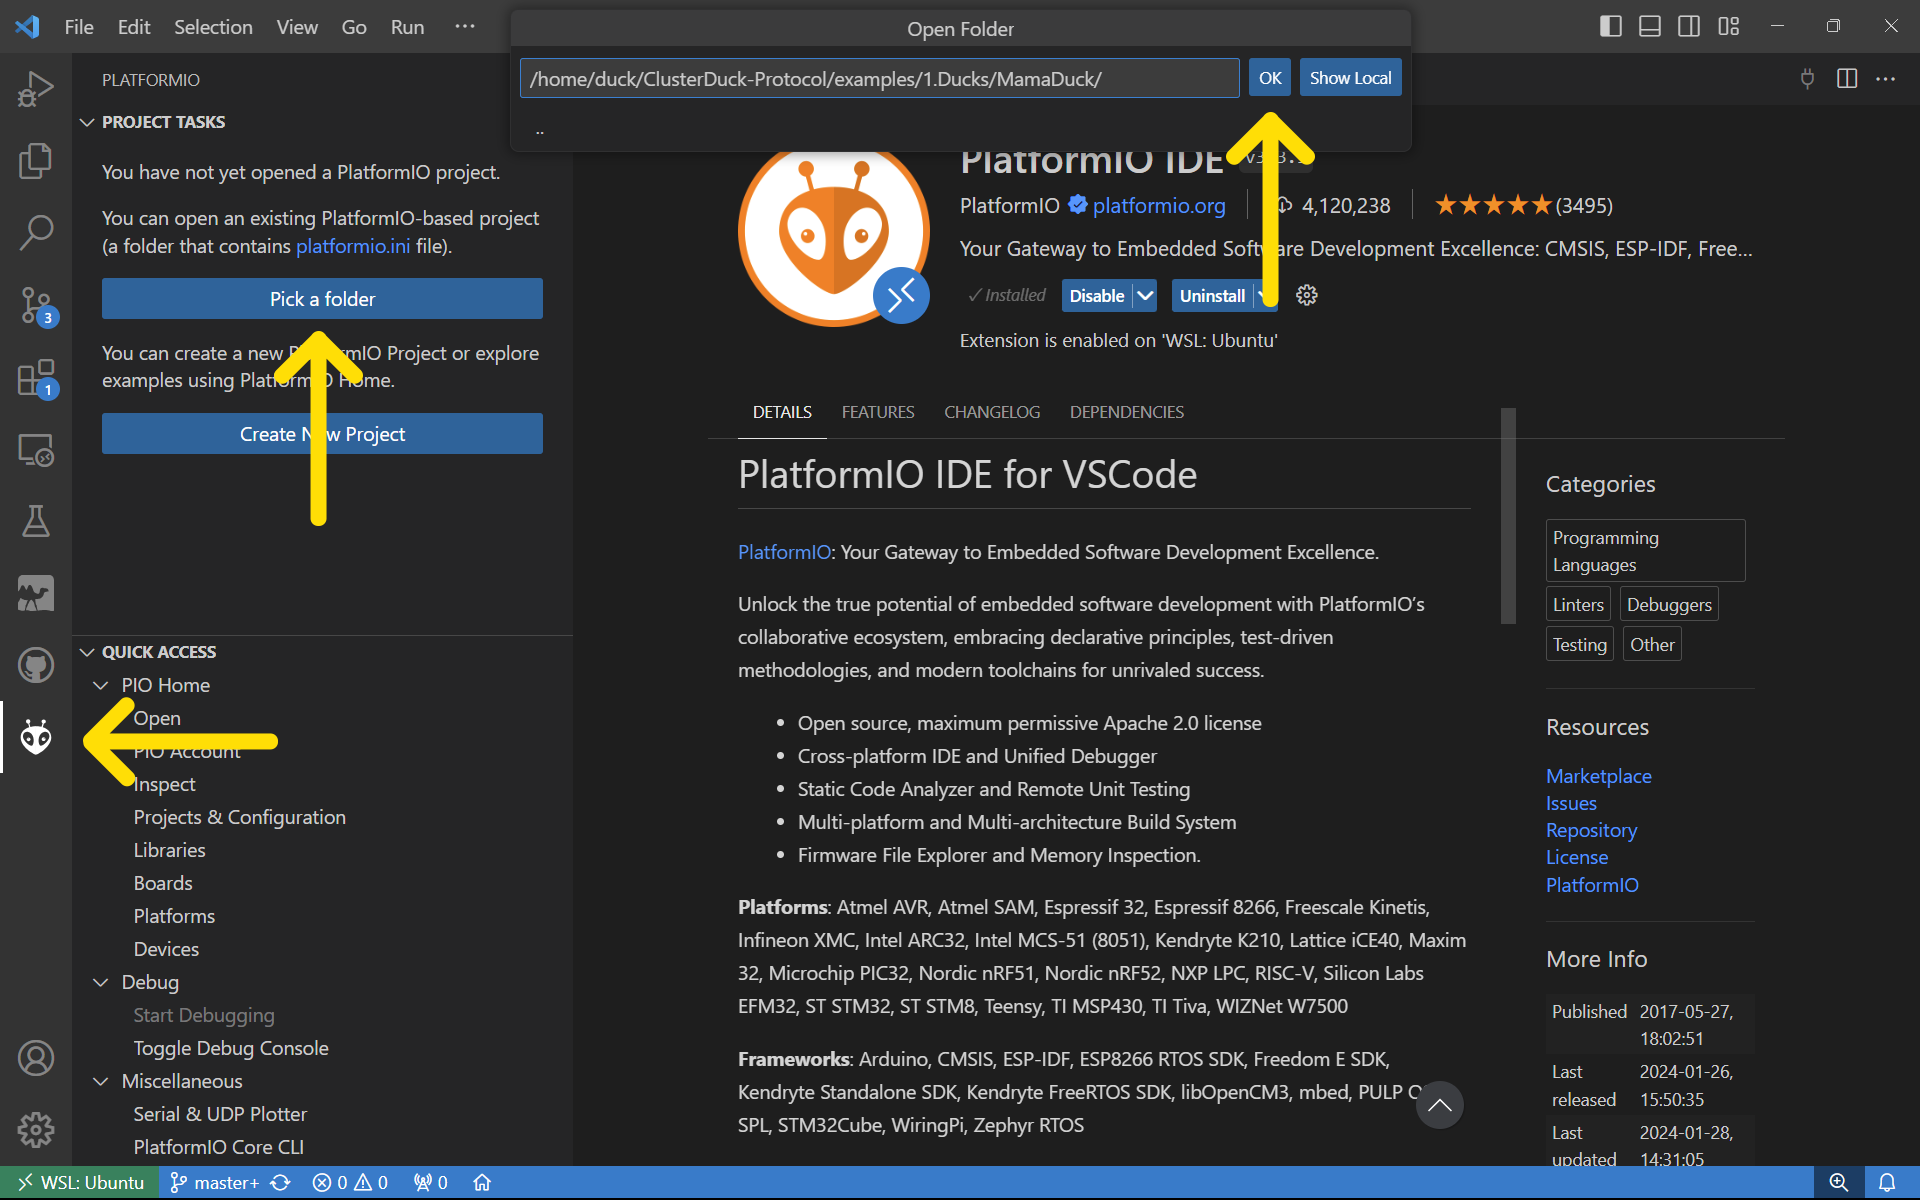
To start the PlatformIO extension, click its icon on the sidebar.
Click on Pick a Folder and open ClusterDuck-Protocol/examples/1.Ducks/MamaDuck when prompted.
Note: there are different ways of doing the same thing on PlatformIO. This tutorial highlights its basic IDE tools and mentions an appropriate alternative if using its command line interface (CLI). If you prefer the CLI, you can start it by clicking its icon on PlatformIO's taskbar

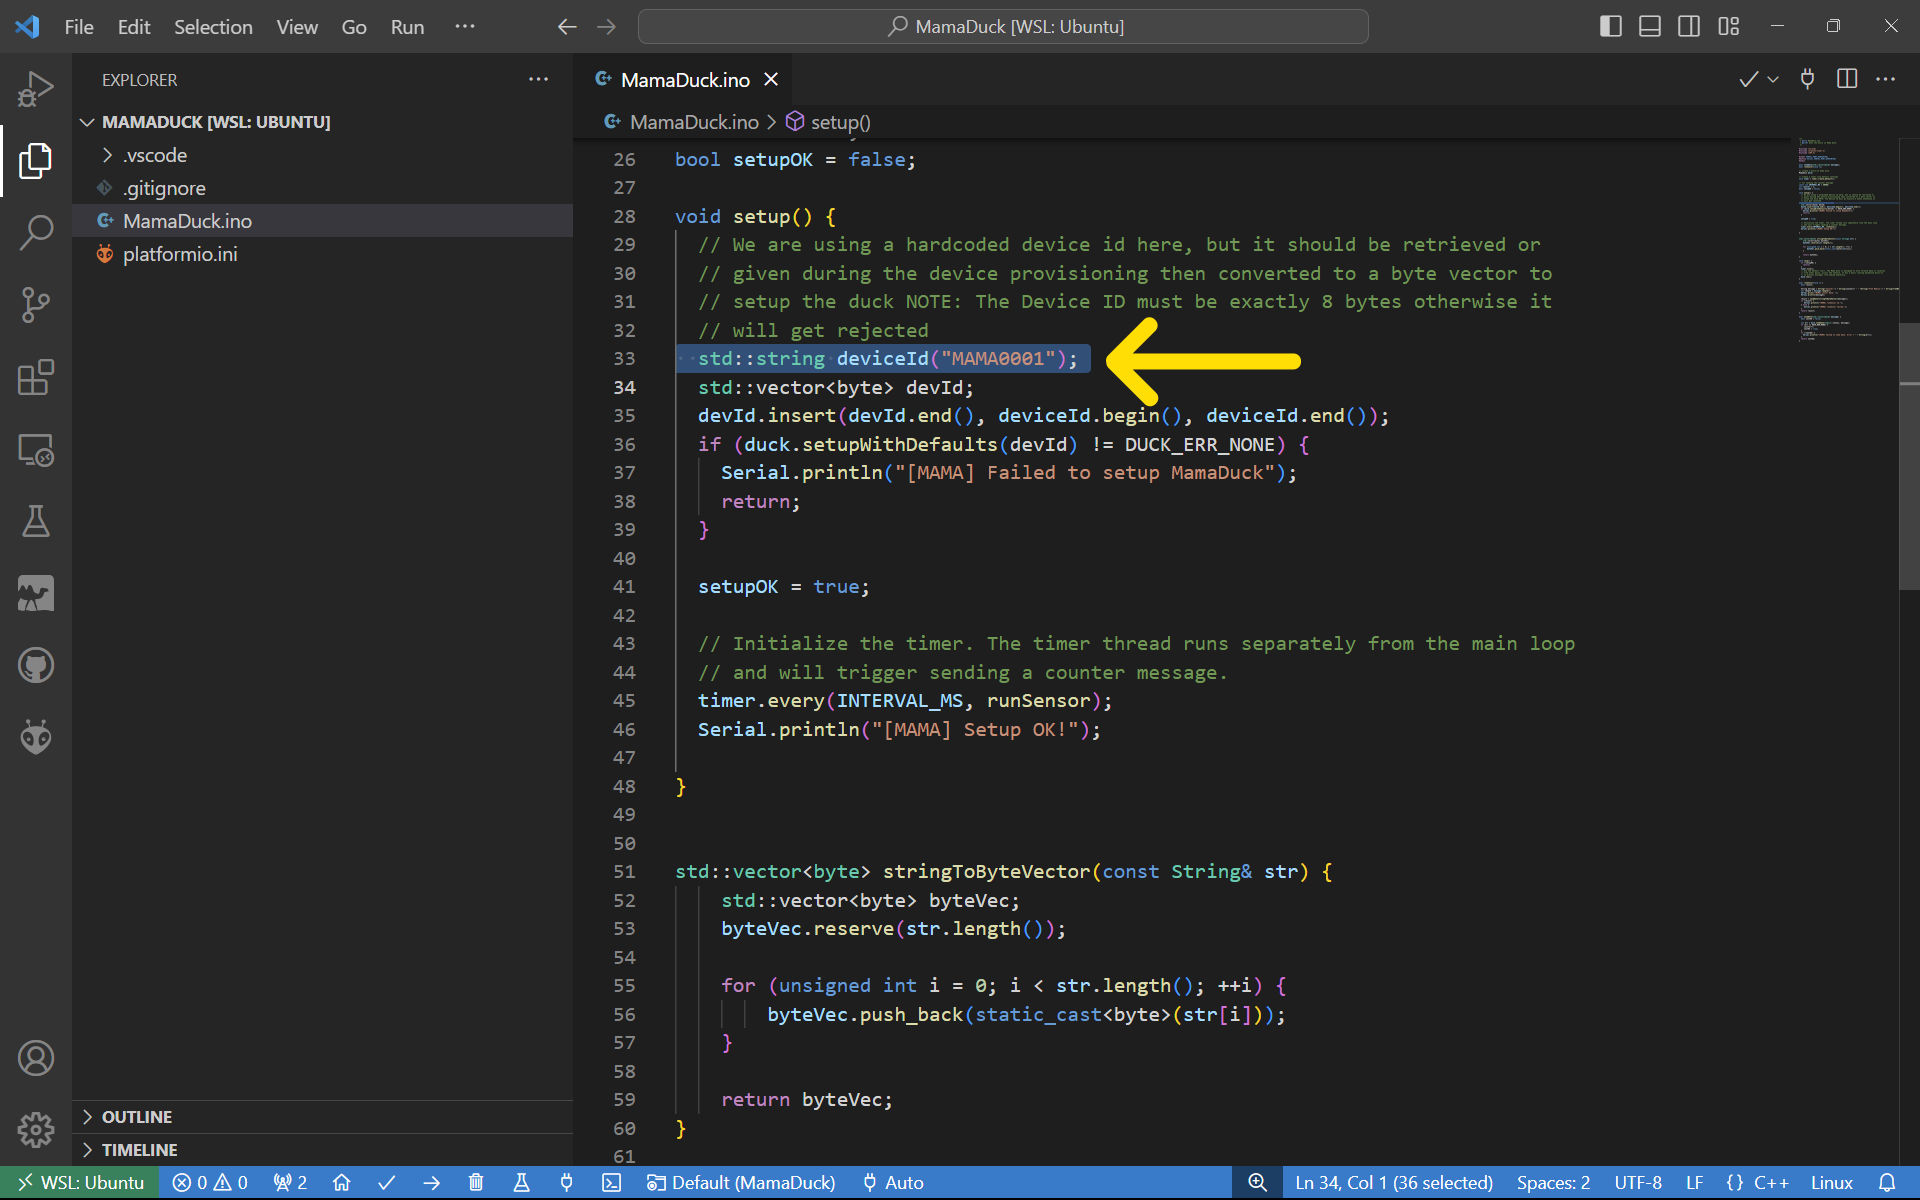
In the MamaDuck.ino file, set your MamaDuck ID on line number 33:
std::string deviceId("MAMA0001");, or use the default. Make sure the final ID is 8
characters long. Each device is required to have a unique identifier to operate properly in
the network.
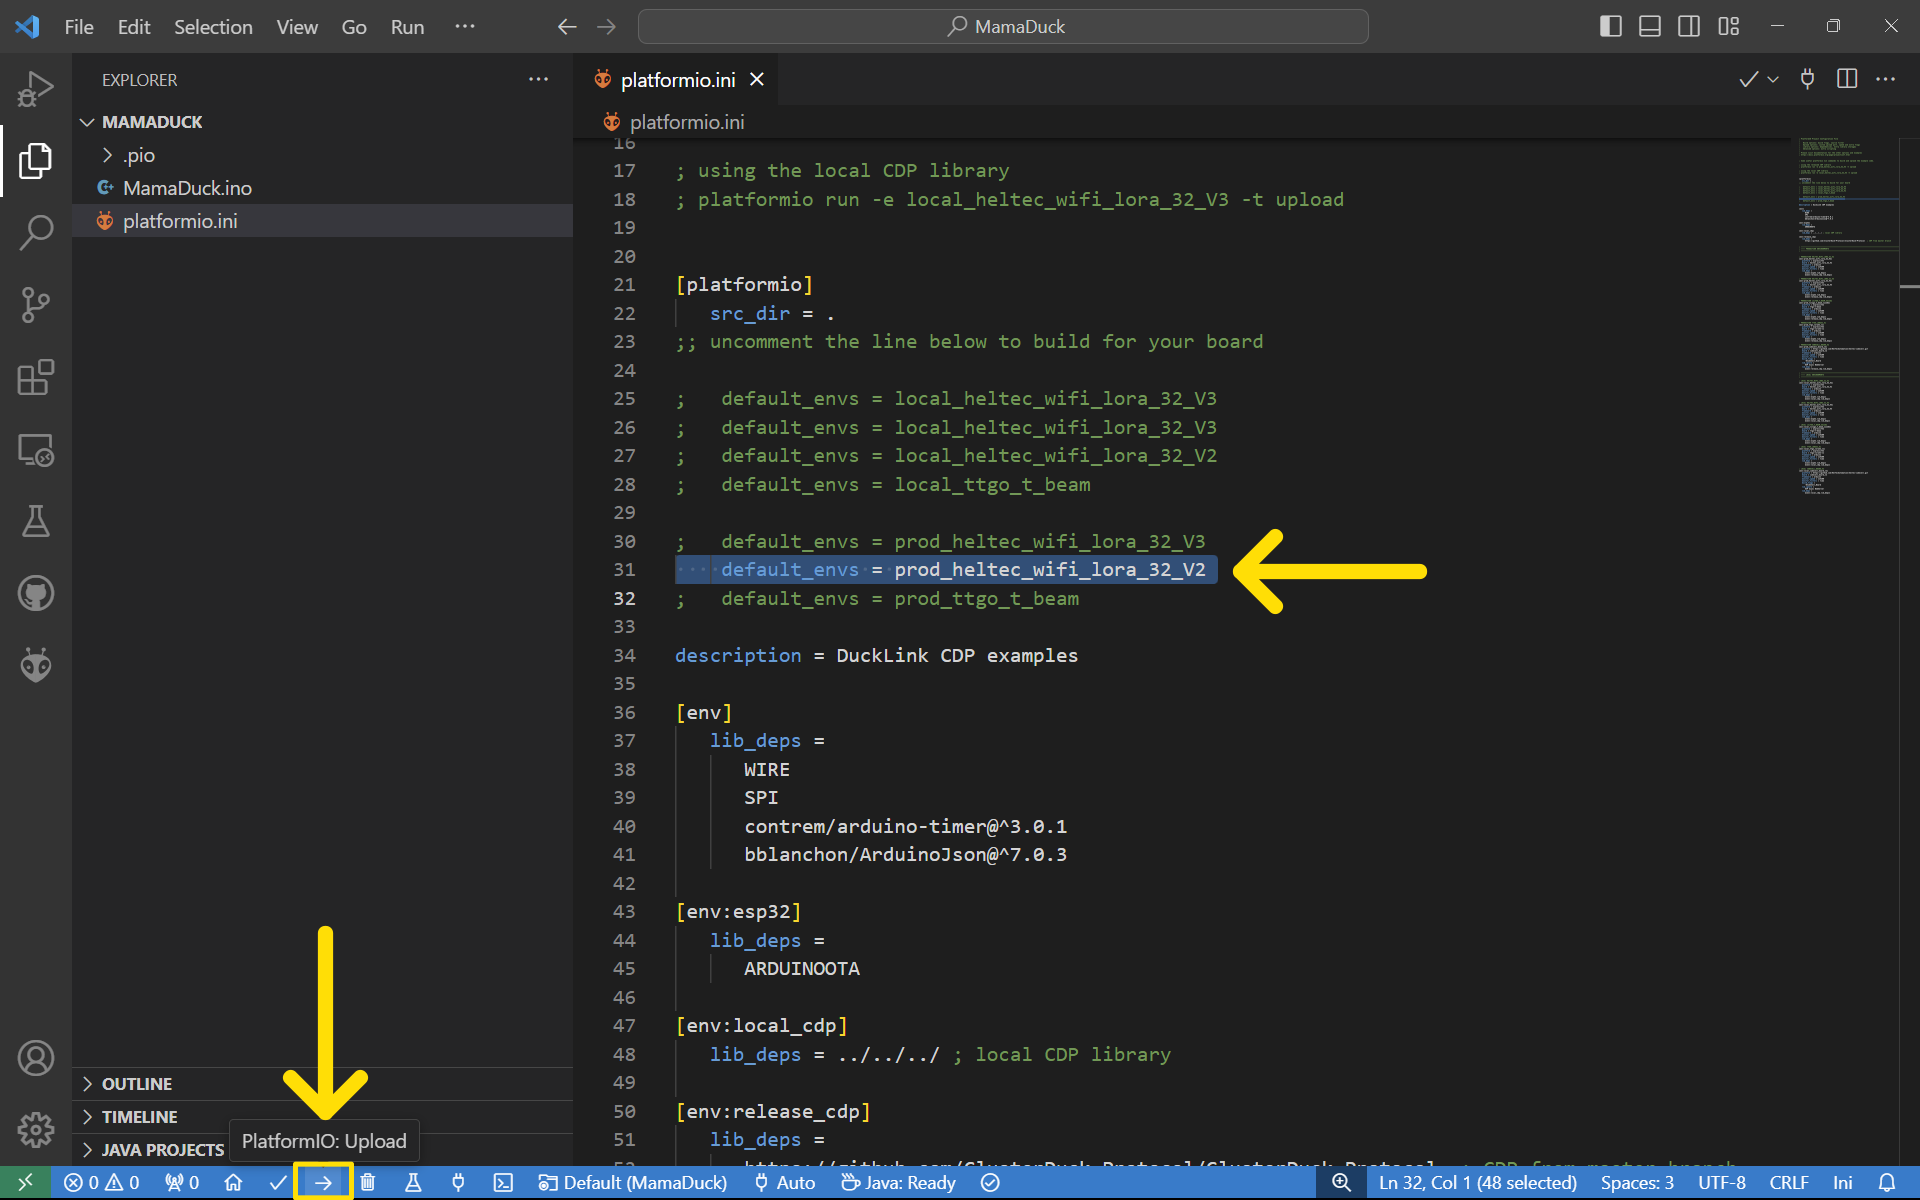
The platformio.ini file in this folder contains the configurations to build your MamaDuck. It also allows us to adapt the Duck to different boards and environments. I'm using a Heltec Wifi Lora 32 V2, so I can select its environment as the default by commenting it out in this file.
Note that I'm selecting the production environment because I want to use the released CDP instead of a local copy. If you clone the CDP repo, modify some files, and want to build one of the examples to reflect your changes, you should select the local environment instead.
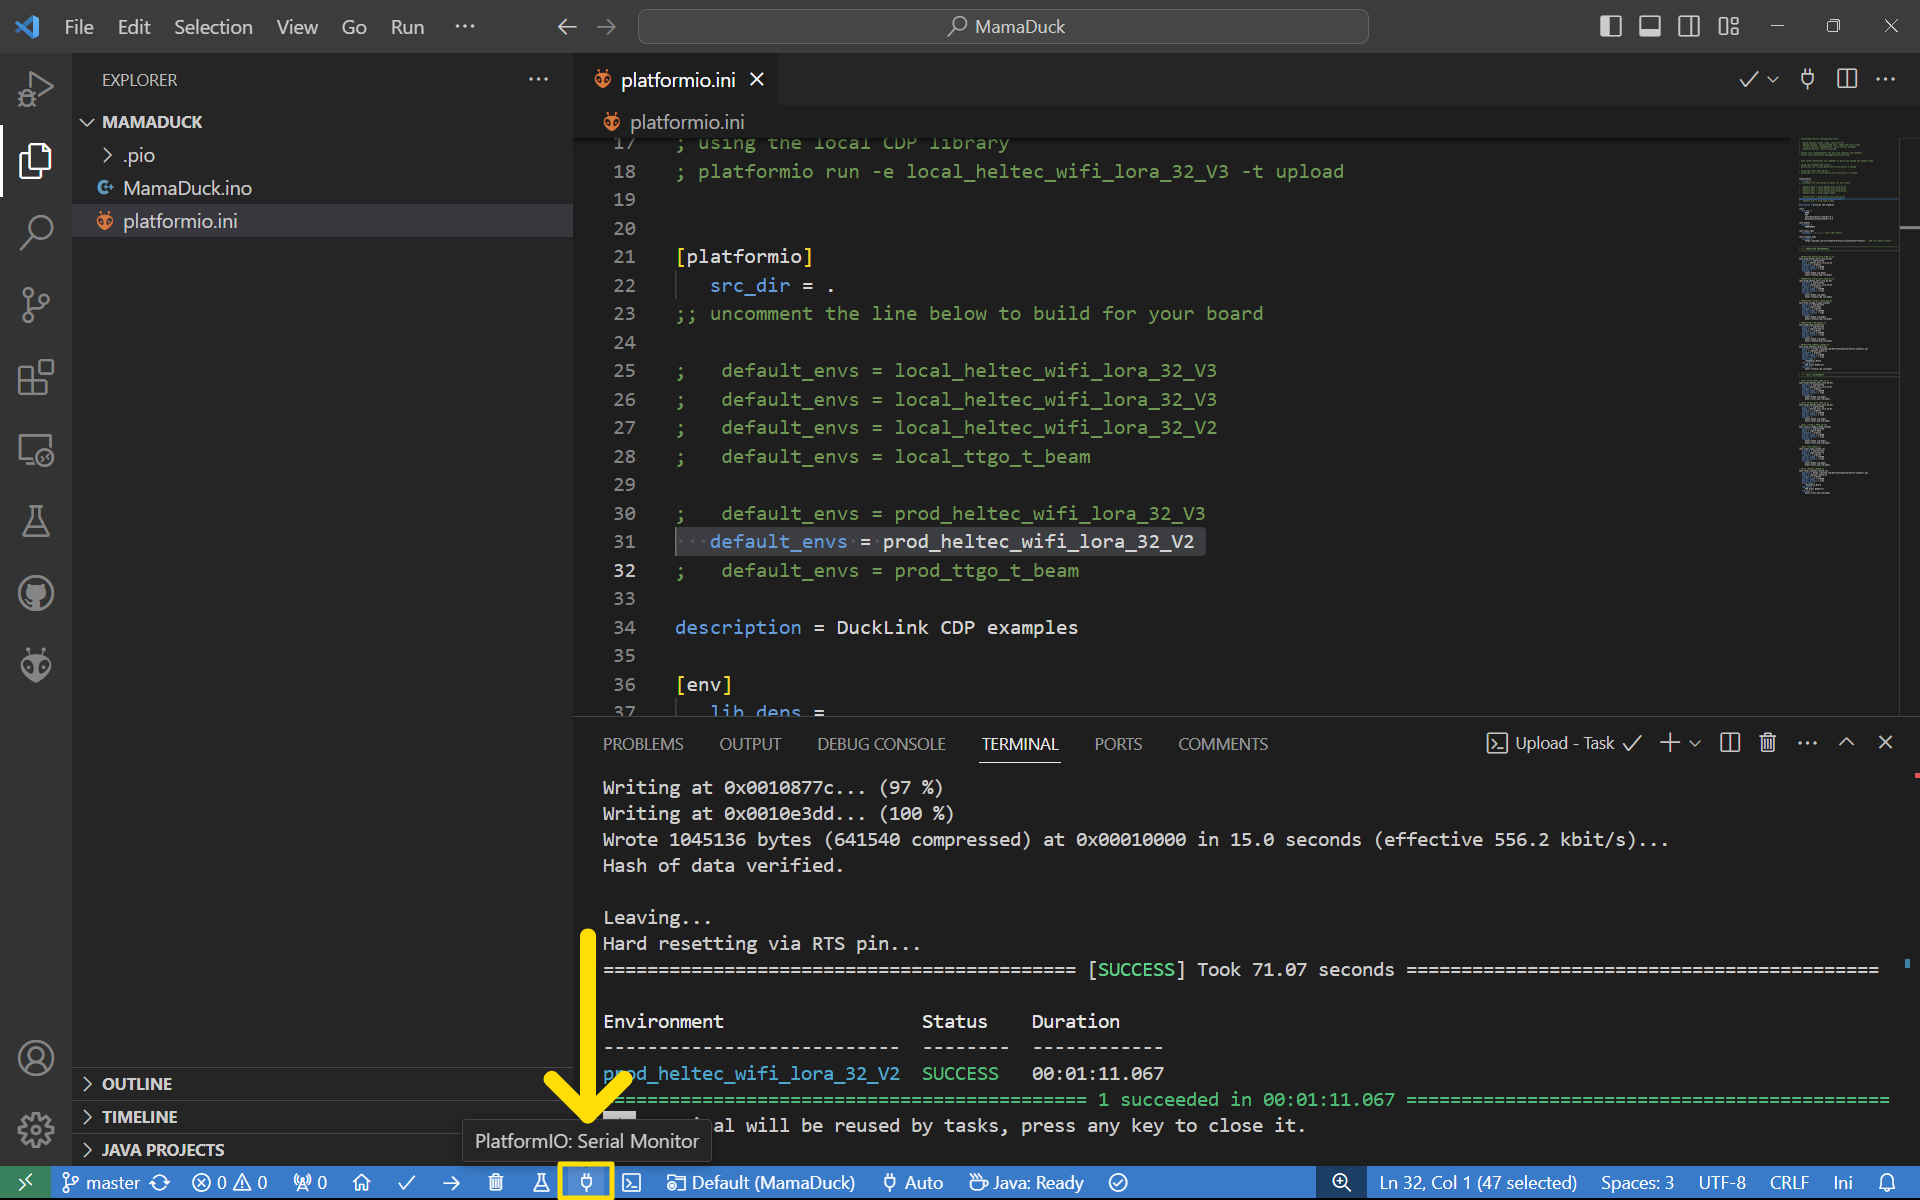
After setting your MamaDuck ID and board environment, click the upload icon on the taskbar.
If using the CLI, type platformio run -e prod_heltec_wifi_lora_32_V2 -t upload to
select the environment and upload to the board in one step.
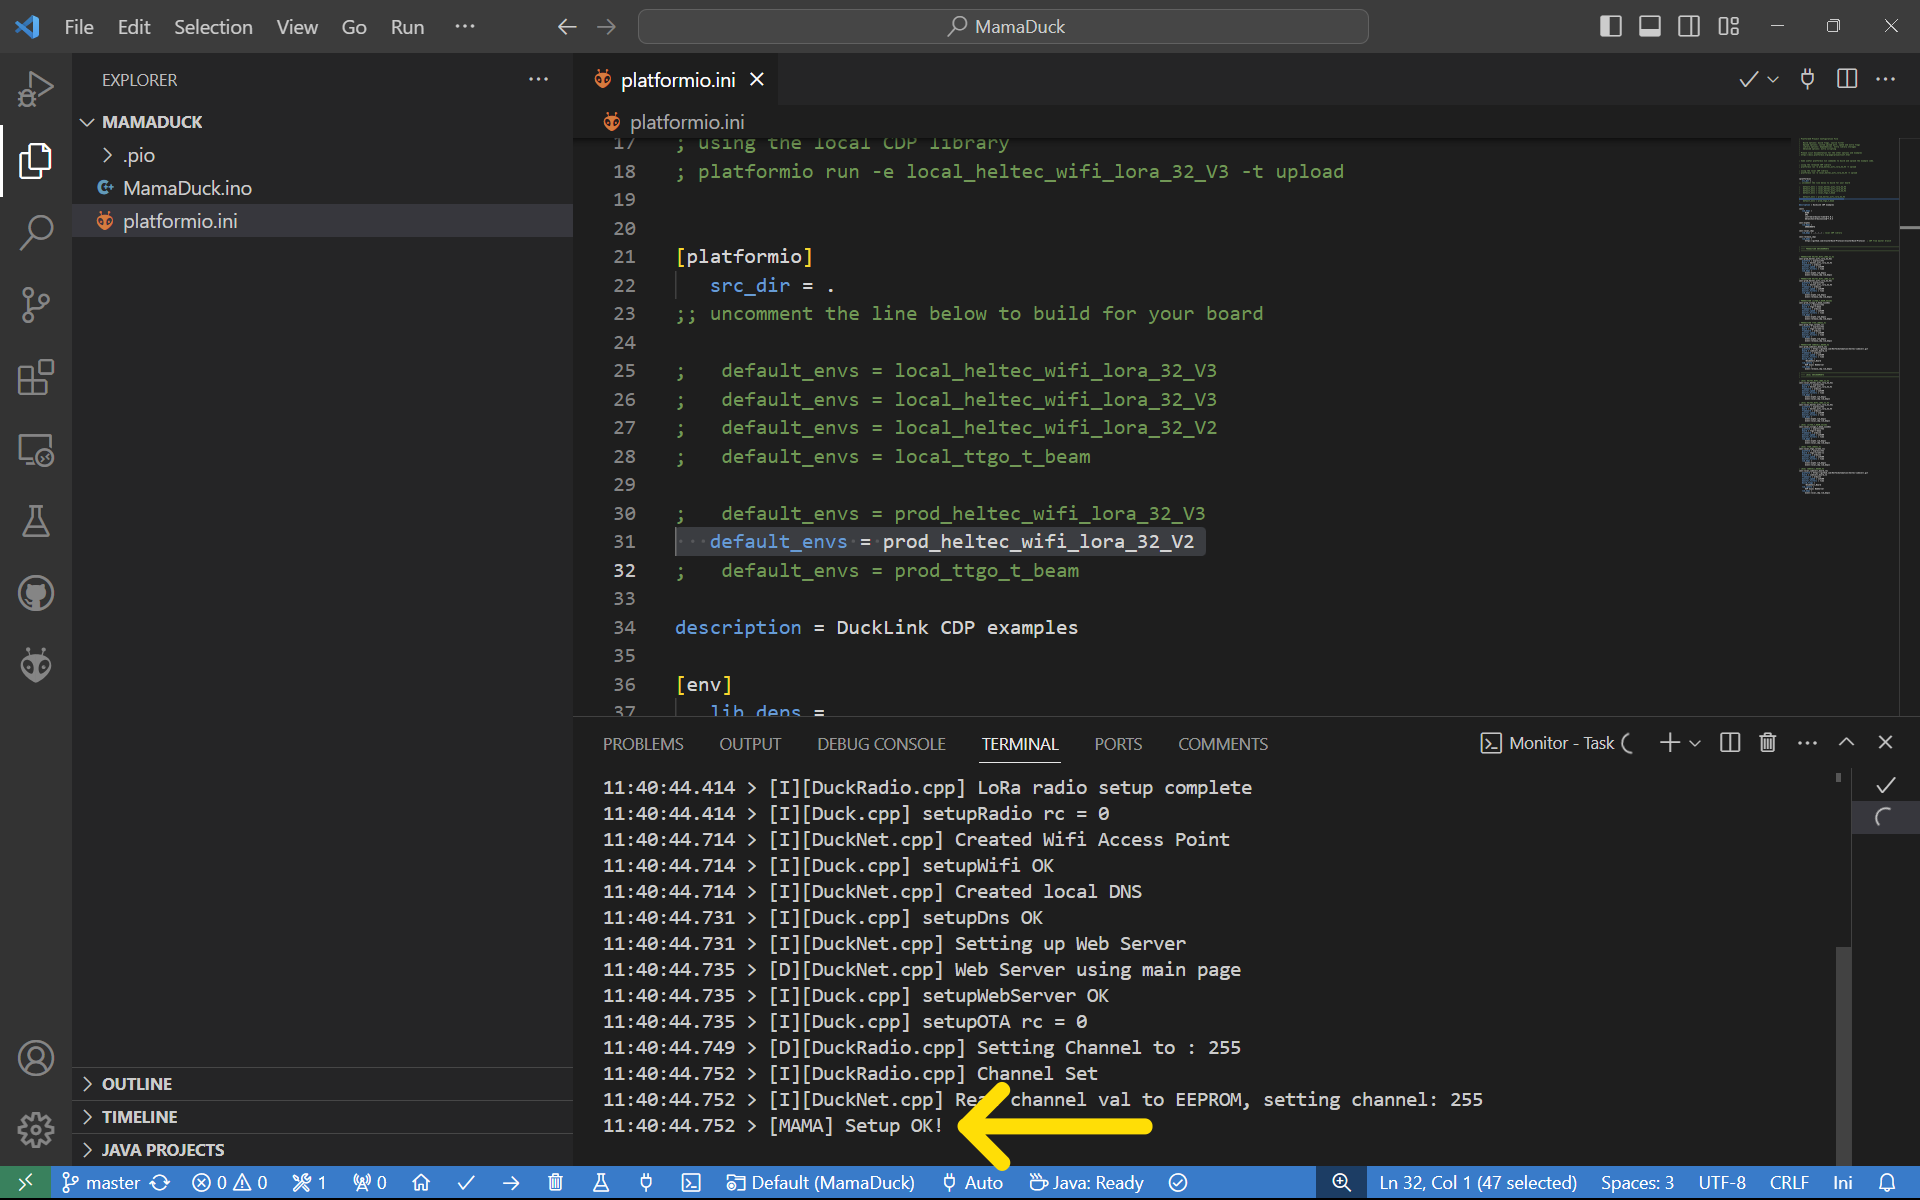
If the upload was successful, click on the serial monitor icon on the taskbar and
check that your MamaDuck was configured correctly. If using the CLI, type
platformio device monitor -e prod_heltec_wifi_lora_32_V2.
You should see a [MAMA]: Setup OK! message.
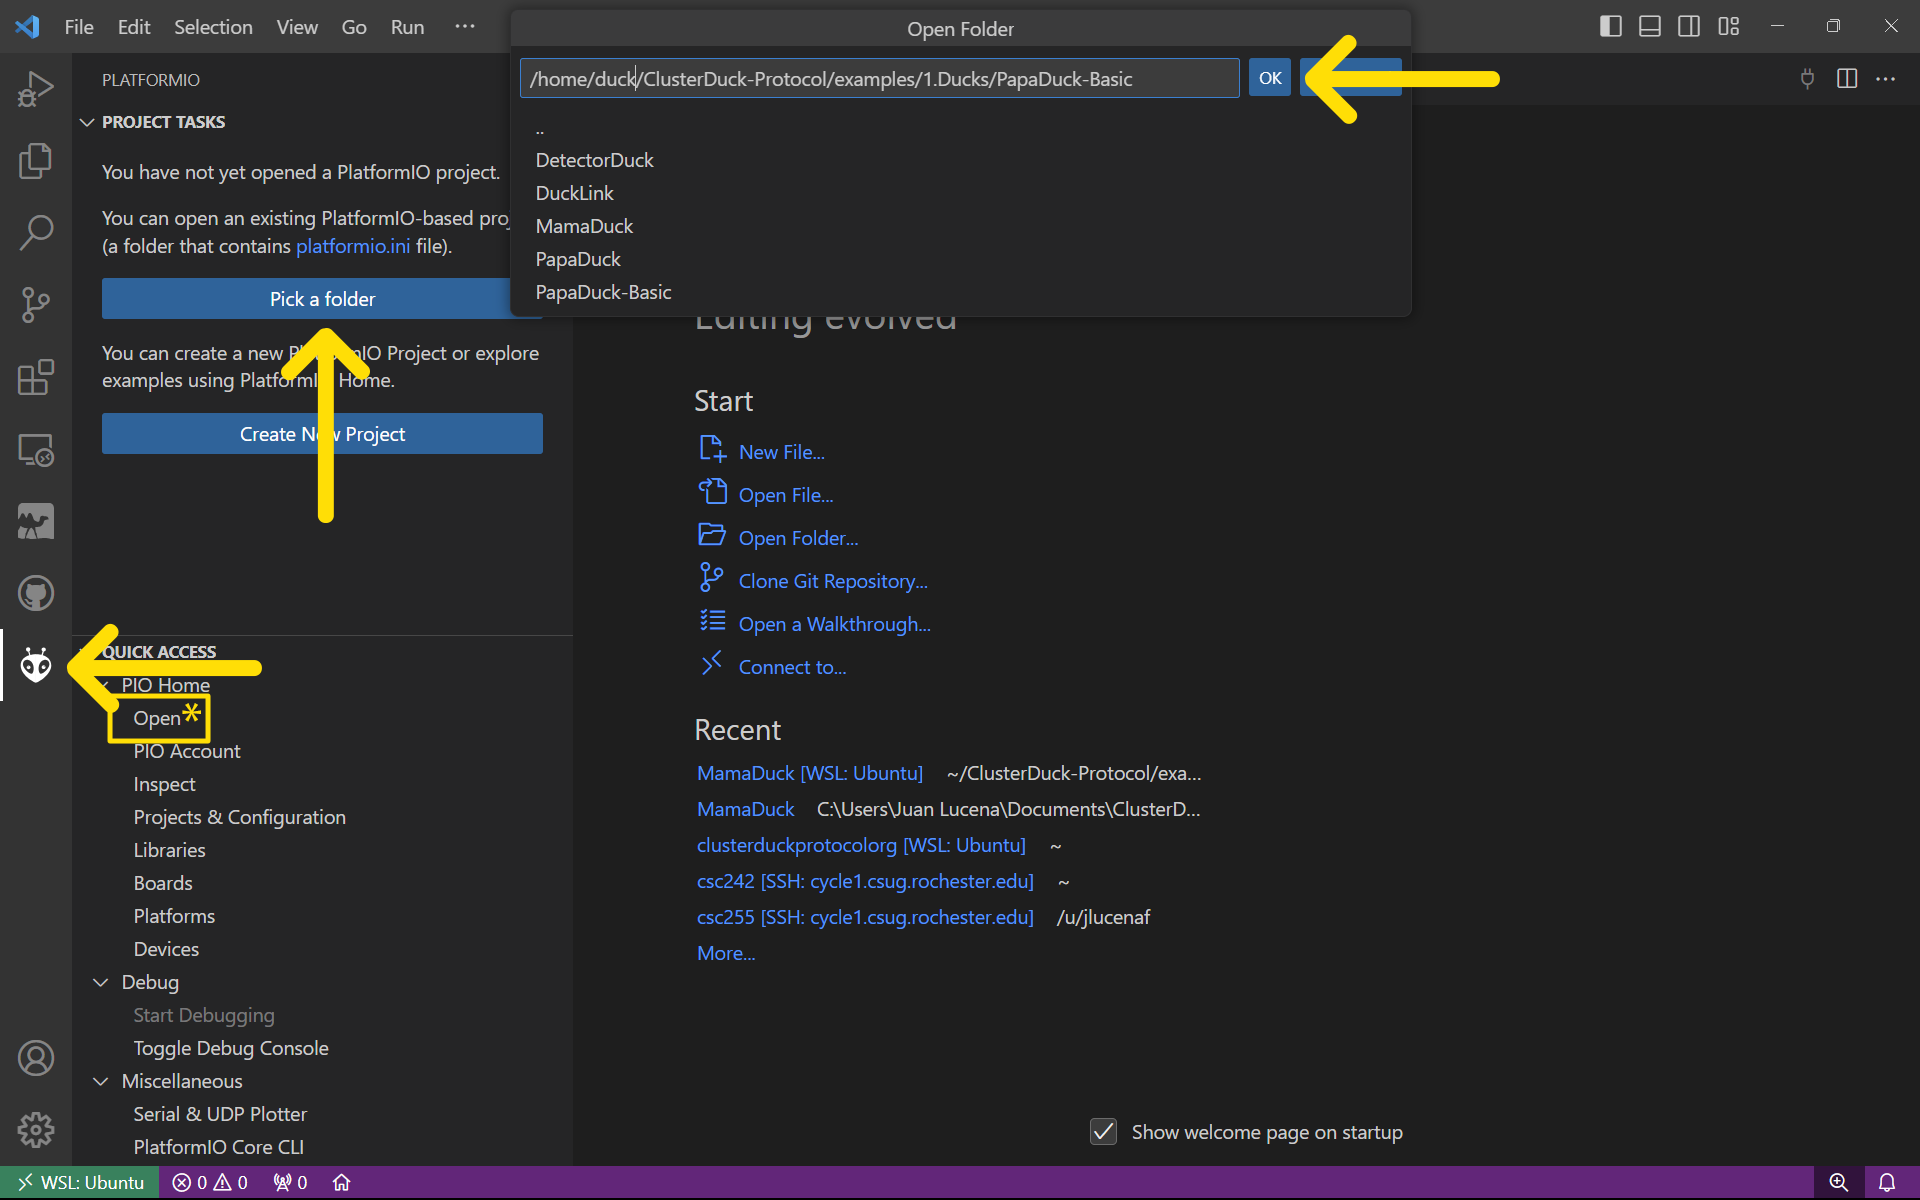
Step 3: Configure PapaDuck-Basic
There are two PapaDuck examples currently listed in ClusterDuck-Protocol/examples/1.Ducks: PapaDuck and PapaDuck-Basic.
The PapaDuck example forwards all messages (except pings) to the cloud, while the PapaDuck-Basic doesn't. We'll be using the PapaDuck-Basic to communicate with our MamaDuck and output messages to the serial monitor in JSON format.
To start configuring your PapaDuck-Basic, disconnect your MamaDuck from the computer and get another development board. On a new window (or by clicking Open in the PlatformIO extension on the same window —shown with an asterisk), open the ClusterDuck-Protocol/examples/1.Ducks/PapaDuck-Basic as a PlatormIO project.
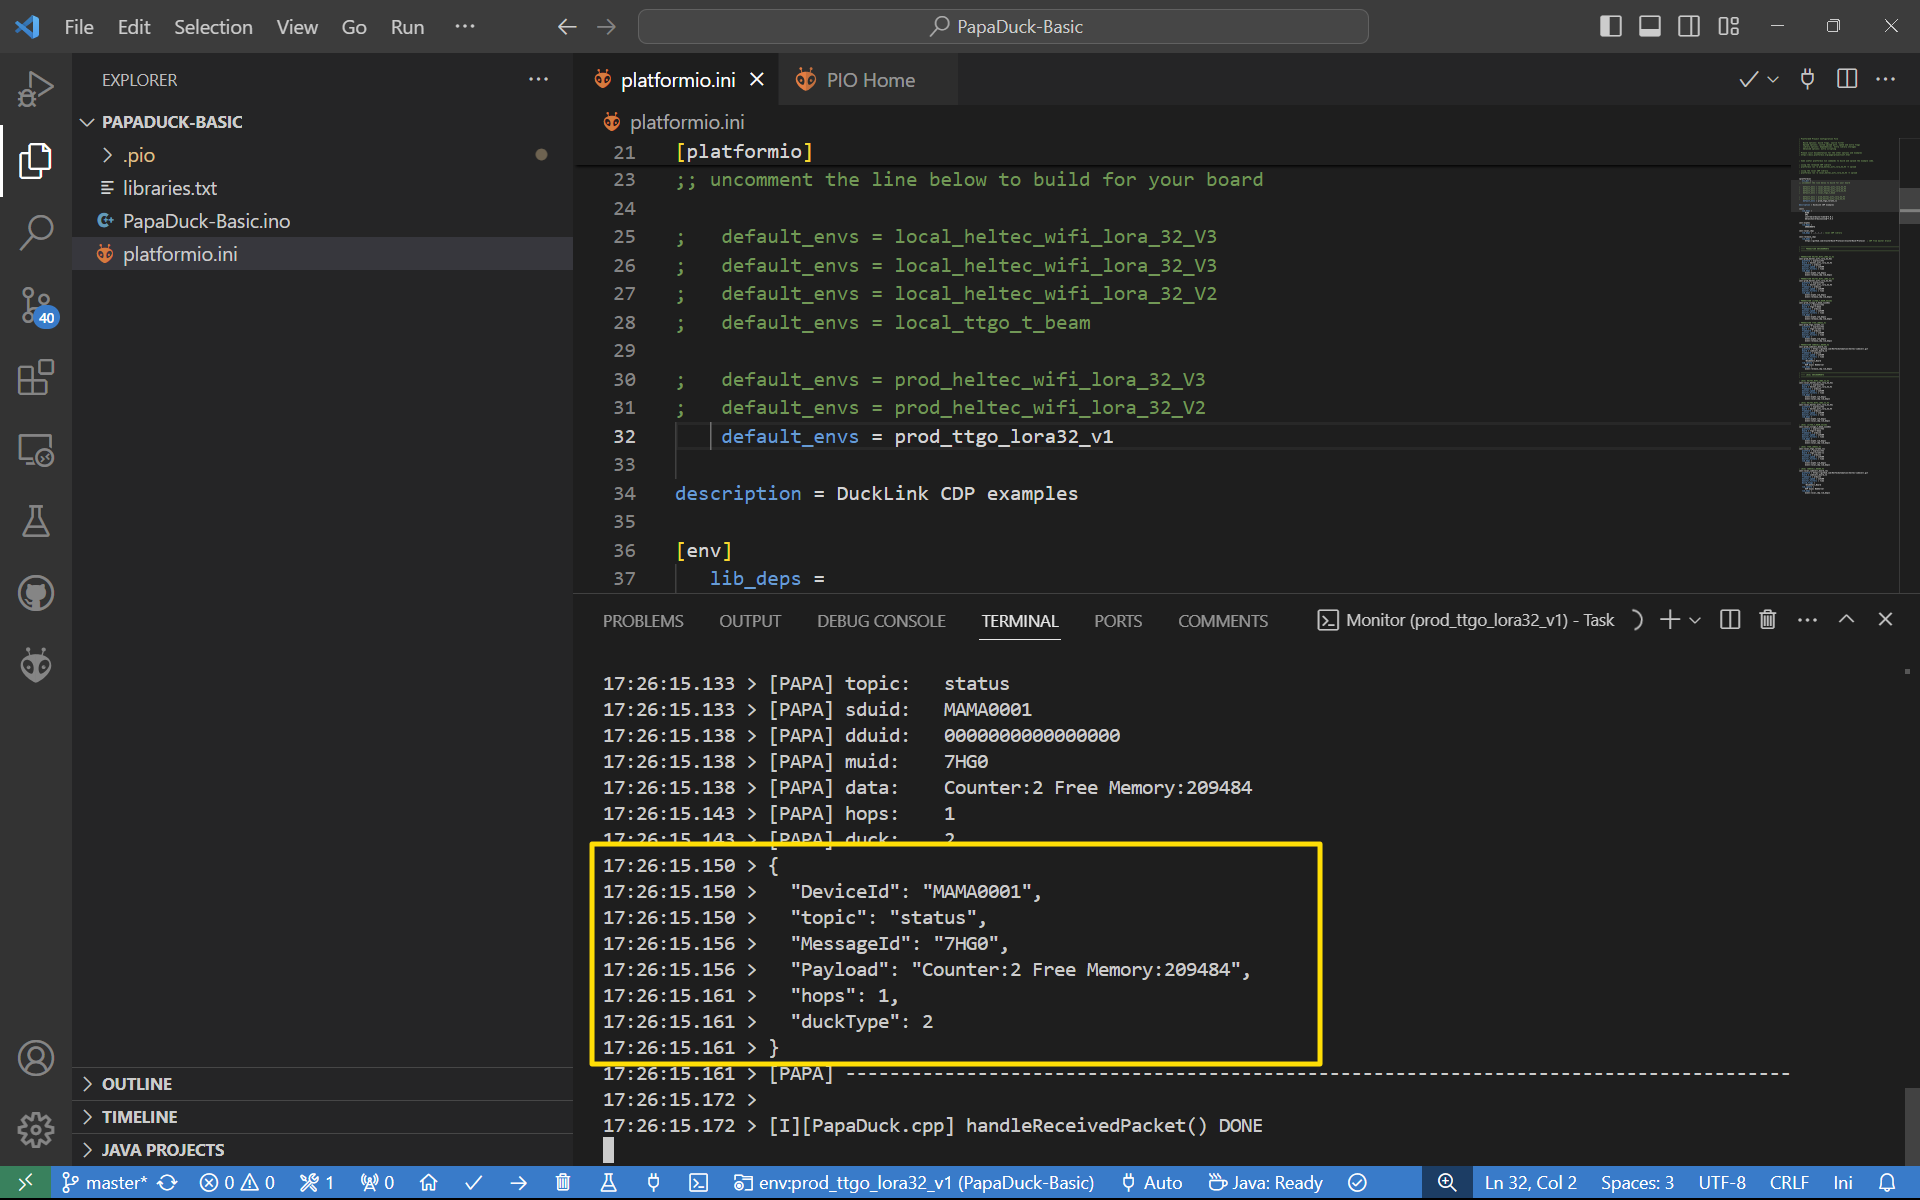
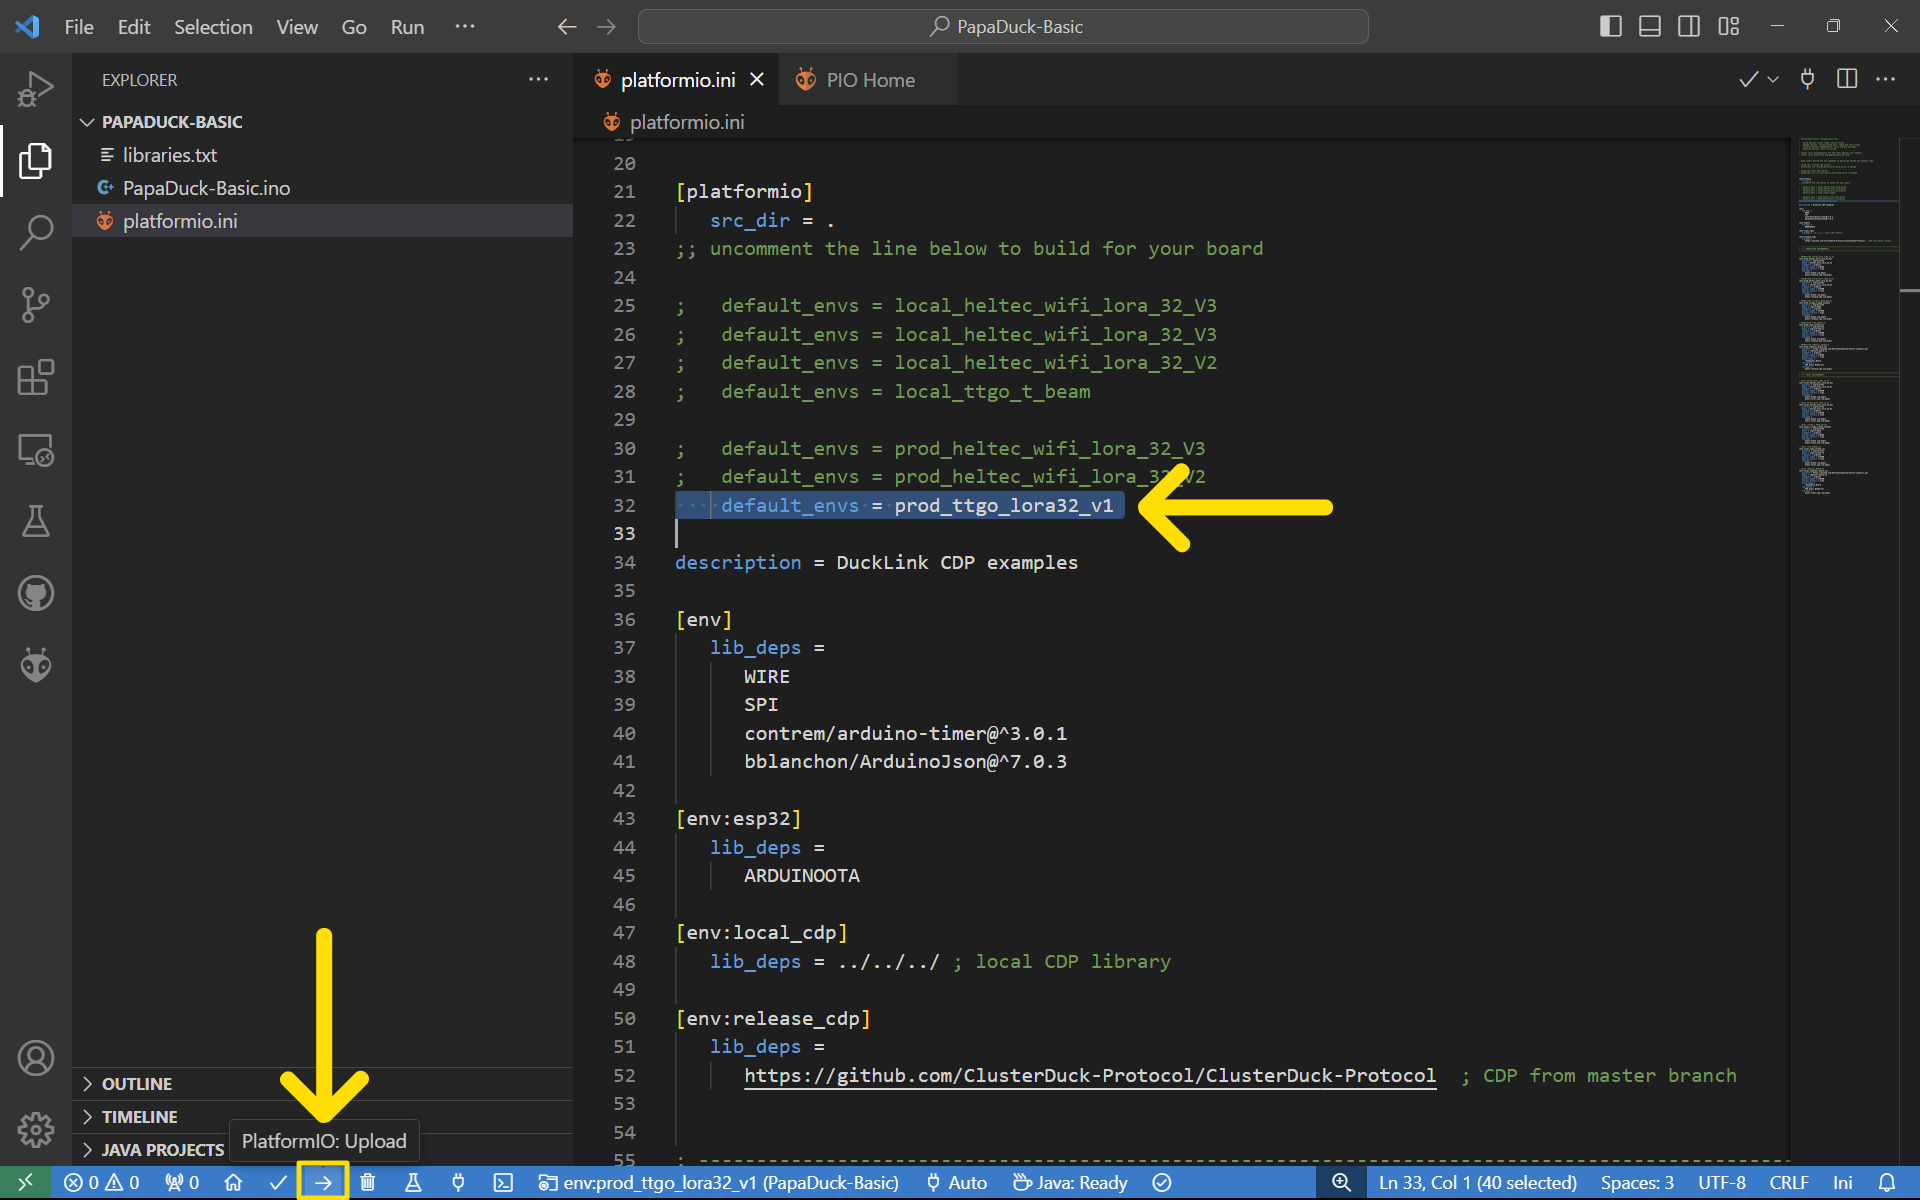
I'm using a TTGO T-Beam (with a SX127x LoRa module) as my PapaDuck-Basic, so I will set its production environment as the default in its platormio.ini file, just like we did with our MamaDuck.
Click the upload icon on the taskbar or type
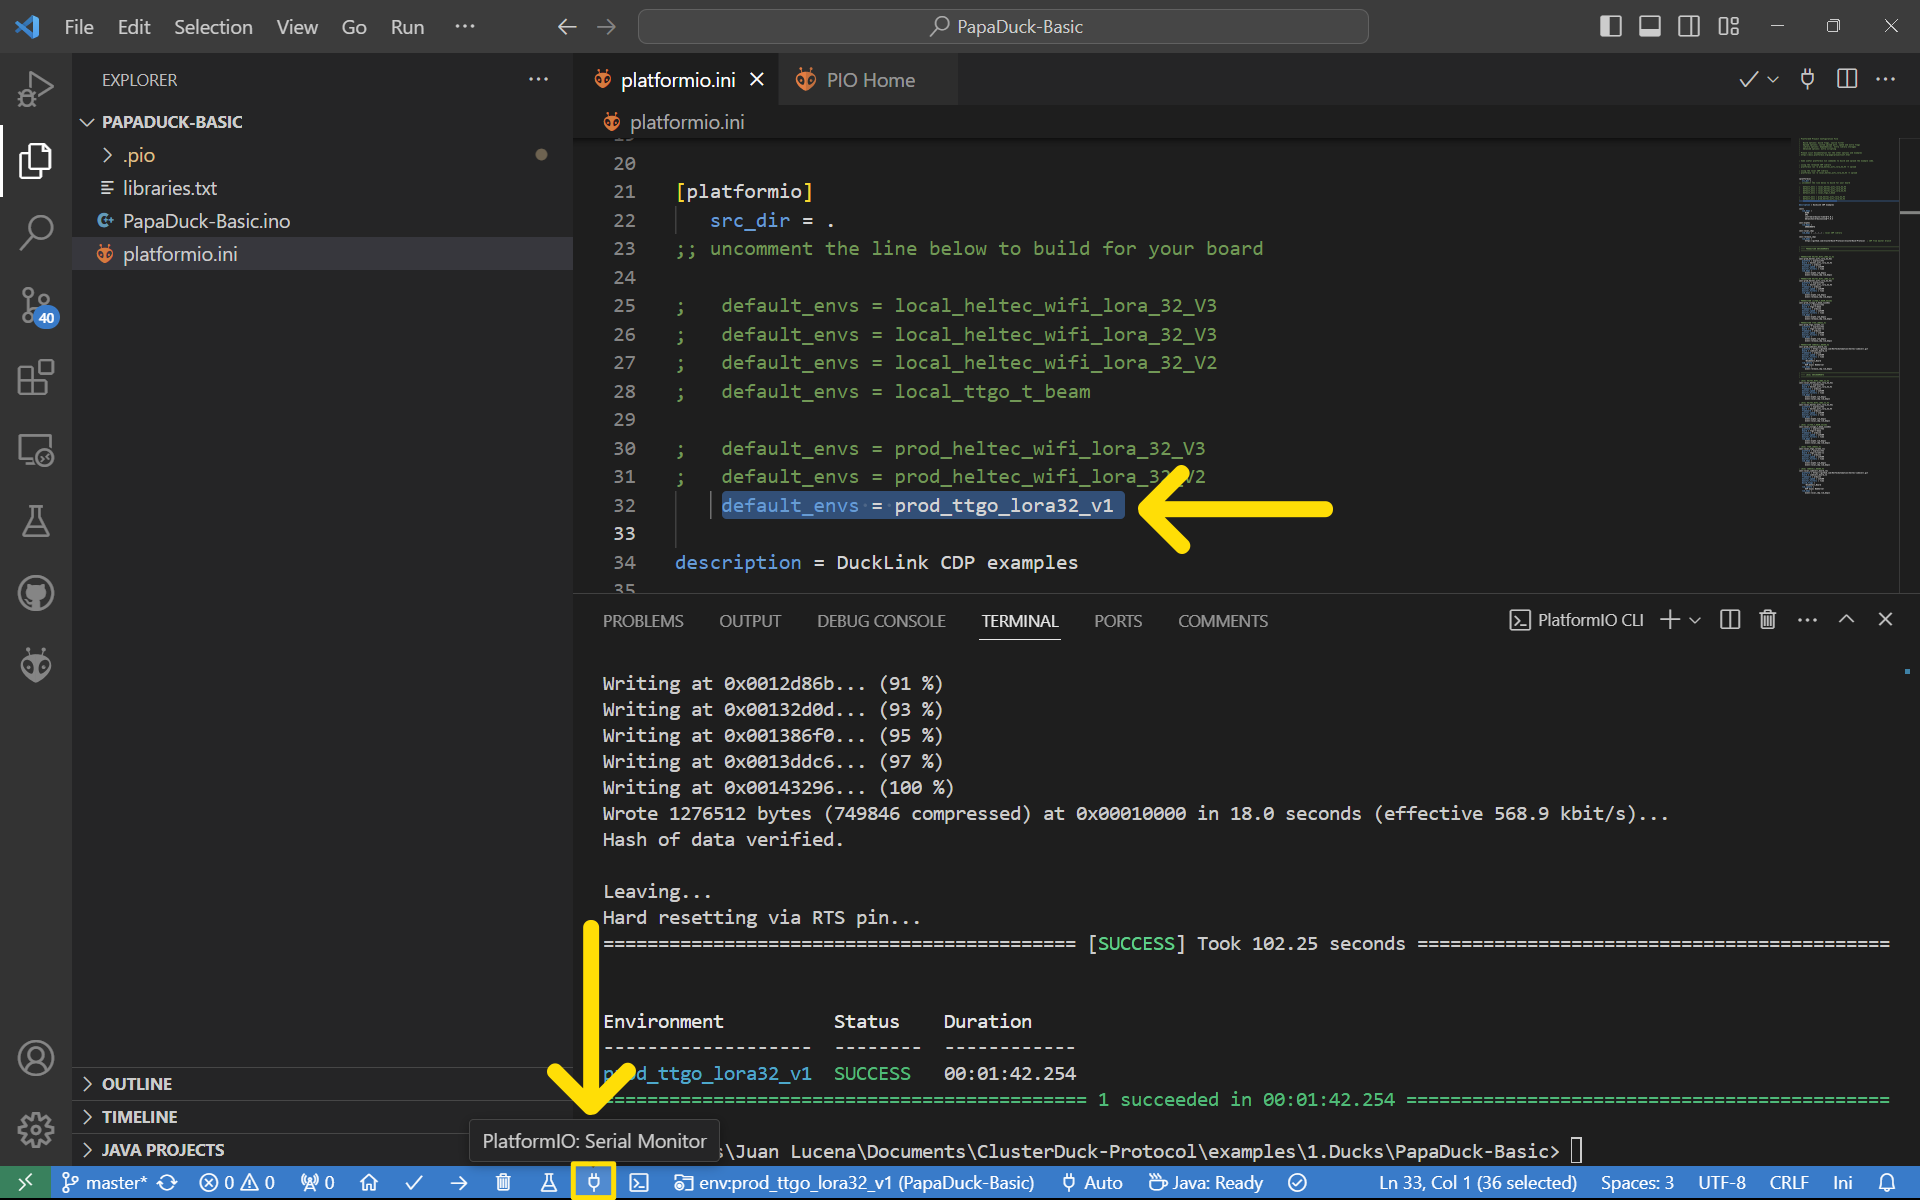
platformio run -e prod_ttgo_lora32_v1 -t upload in the CLI.
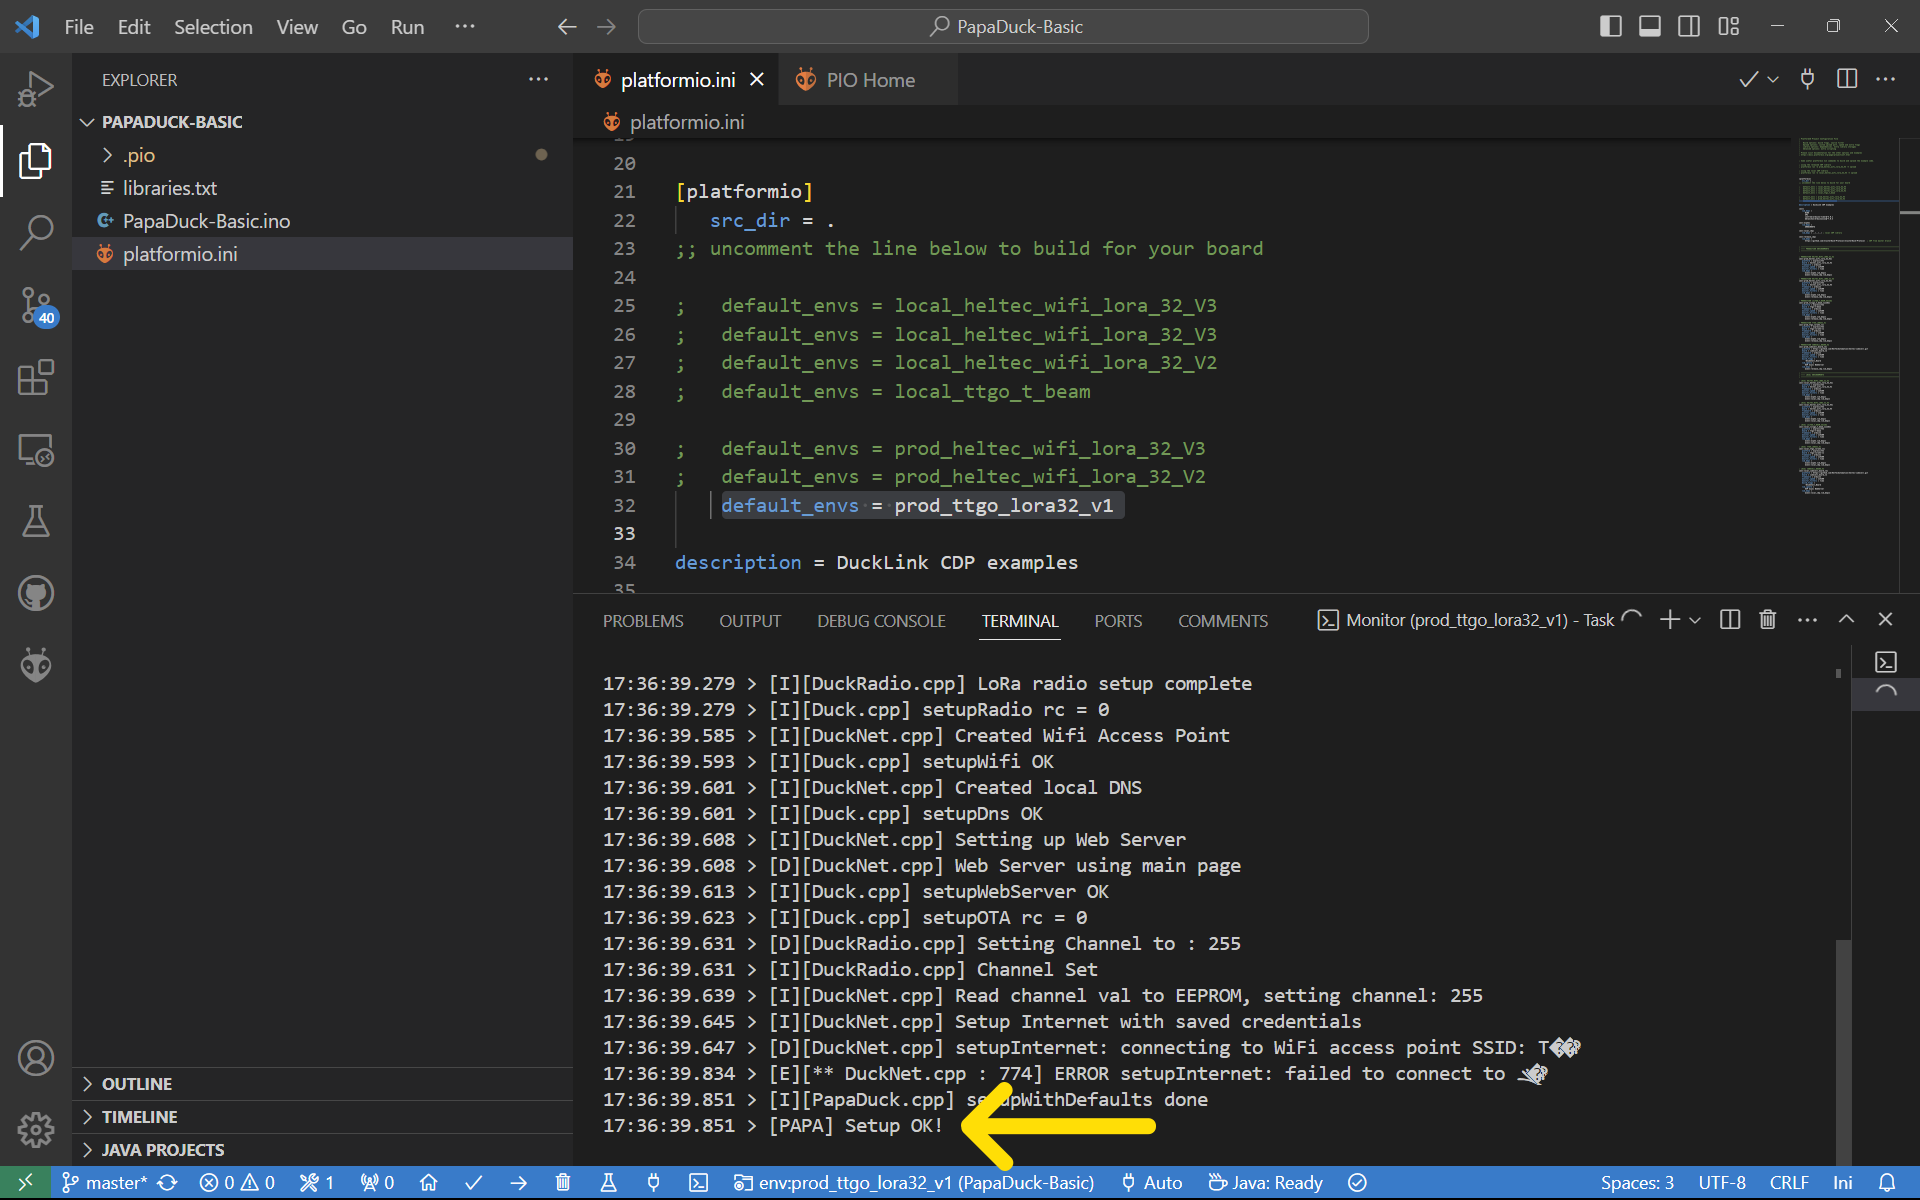
If the upload was successful, click on the serial monitor icon on the taskbar and
check that your PapaDuck-Basic was configured correctly. If using the CLI, type
platformio device monitor -e prod_ttgo_lora32_v1.
You should see a [PAPA]: Setup OK! message.
Step 5: Test the Network
With your PapaDuck-Basic still connected to your computer and its serial monitor open, plug your MamaDuck into any power source. Make sure both boards have their antennas attached.
Look in the serial monitor for any incoming messages from the MamaDuck. If messages start showing up, your network is working!